Friday, April 26, 2013

Kid's Calendar

I don't know about you, but the little guy always seems to be asking me when we're doing xyz activity coming up, or when is his birthday, or when is Christmas or Easter or whatever.

So, I finally took a minute and sat down with him and made a calendar.

You can download my master here.

I just write in little numbers in the top corner of each day to keep my head on straight. Then he and I sit down and together we draw little symbols on special days, and even regular-type days.

Types of days we put on his calendar:
  • Birthdays/birthday parties (with the little guy's birthday coming up, we marked the day of his party, as well as the actual day of his birthday)
  • Holidays
  • Vacations/trips (not that we do this often)
  • Preschool days (even though it's preschool here at home)
  • Days we will have visitors (including when the cousins come over to play)
  • Library days
  • Days we visit Grandma's house
 We then put it up on the fridge. He has had a lot of fun telling anyone nearby how many days are left until... whatever. We have a small magnet that he uses to mark which day is today, we just move it along as we go.


Wednesday, April 24, 2013

E Week Activities


As promised, here are our E activities.


Elephant Parade

Wow. This is probably one of my favorite activities to date. And the kids enjoyed it so much, we did it several times. And, as can be expected: simple.

Step 1: Everyone gets in a line. You're in front. You're the leader.
Step 2: Push PLAY on the "elephant parade" music. THIS is my favorite.
Step 3: Forget you're an adult. Lead the little ones around the room using your arm as a trunk, dancing however you think elephants might dance. Or however you want to.

Bam! Elephant Parade!


Easter Egg Puzzle


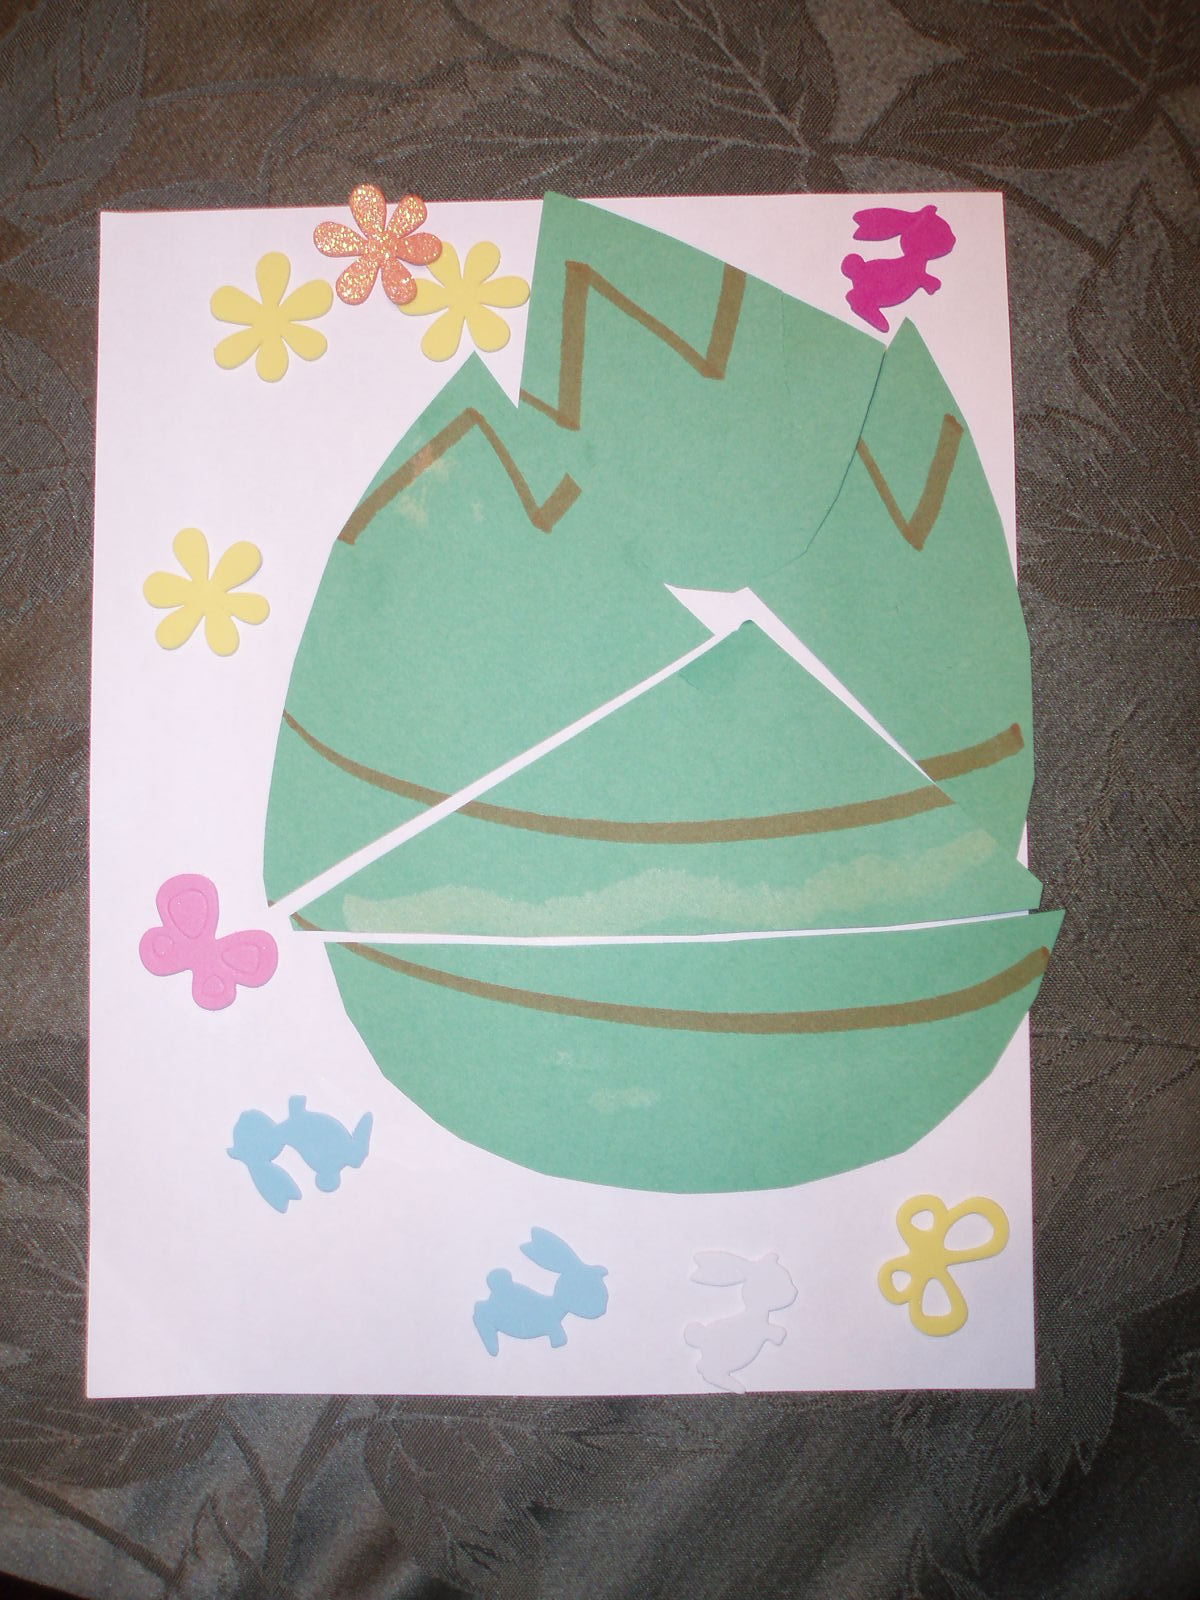
My beautiful Momma actually created this one, so I must give credit where credit is due. Since we did this activity with the little guy, along with all of his little cousins. Since we had a variety of ages (range 2 to 8), my Momma personalized the puzzles - the older the child, the more pieces the puzzle was cut into, the more difficult the puzzle.

The puzzles were kept in envelopes with each child's name; they assembled their puzzles, then were given glue sticks (some with assistance for the very young) to glue the assembled puzzle to a piece of paper. We then gave them some foam stickers and let them go to town to decorate their assembled egg puzzles. (Though my little guy chose to decorate around his egg instead.)


E Hunt

The little ones of all ages had a blast with this one. Prior to them arriving, I printed out many Es, cut them out. I then selected a color for each of the children, and circled the Es in those colors. I then hid the Es around the room. I hid them appropriately according to ages. (The eight-year-old had the red Es, which were all hidden very inconspicuously around the room. The two-year-old had the orange Es, which were hidden very obviously around the room.) Once they found each E, they stuck them on the wall next to the big E I created. They had a blast. The end result looked like this:


 E-E-Elephant Eggs

 Alright, I'm stepping out of the norm here. I actually did something complicated. At least it was complicated as far as my standards go.

This one all started when my Momma went looking to purchase the Elefun game. She couldn't find it in the store that she was at, but she did find this game: Elefun Snackin Safari.

I don't know about you, but buying these kinds of games often has to be saved for birthdays and Christmas, because I don't want to/can't afford to buy toys on a whim.

And thus my (maybe a little ghetto) version of the game was born.


Materials?
This Print Out (or make your own)
Construction Paper 
Old (or new) Nylon Stockings - Washed (knee highs preferred, or cut off the legs for full stockings)
Masking  or Duct Tape
Some Type of Magnets
Paperclips
Some Type of Elastic String

What did I do? I'll keep this as simple as possible:

Print out the head.
Cut out the trunk nose.
Place a magnet in the bottom of the nylon, and tie a small knot to hold it in place.
String the nylon through the trunk and tape to the back side of the elephant.
Tape, glue, or otherwise attach the elephant to construction paper.
Cut out the eyes.
Hole punch the sides, string with enough elastic string that you can somehow attach it to your little one's face or forehead.
Cut out egg-shaped pieces of construction paper.
Tape magnets or paperclips to the back of each egg.
Scatter the eggs on the floor.
See how many eggs your little ones can gather using the nylon "trunk."
No hands allowed!


These are the button magnets from Walmart that I used.

Taped magnets or paperclips for each egg.
Close up of the finished "mask" part.


What was really great was watching all of us adults trying to pick up the eggs too. It was absolutely HILARIOUS. And a whole lot of fun.

Tuesday, April 23, 2013

Counting!


Yay for counting!

Here are a few of the fun counting pages we've been doing.


The first one is an exercise that lets the little ones count like objects, and then match them with the correct number. Nothing too spectacular. But, I will say that I had to print out my own copy to show the little guy how to do the first one. After that, he breezed through it. You can download this one here.


The next one can be downloaded here. It's really very simple (as if that was a surprise). You can use any small items you have on hand for this. We used jelly beans. Because I had some sitting around after Easter. The goal for this one is for the little ones to count out the jelly beans (or other items) and put the correct number on the correct square. The little guy impressed me - who knew he not only can count, but he can recognize his numbers!

Monday, April 22, 2013

E Week


Well, well, well. It's E week.

I don't have anything really exciting for it yet. The exciting stuff will have to come later in the week when I post our activities.


I will, however, post the E coloring page. It's here.

I didn't do the E words coloring sheet this time. Why? Because I wasn't happy with the E word options. So, apologies. I wasn't up for this one this time.

Friday, April 19, 2013

Children's Book Review: The Bubble Gum Kid

   
The Bubble Gum Kid
written by Stu Smith
illustrated by Julia Woolf
 published by Running Press Kids

This is the story of Billy Bob Glum who loves to chew gum. He comes up with a plan using his new bubble-blowing skills to teach Double Chin Dan, the bully, a lesson. Written in rhyming text.

The Little Guy's Impression
As per the usual, this was his favorite. He told me that it's his favorite this week because of "the funny parts."

Mom's Impression
While I'm not certain that I'd consider this one of my all-time favorites, or even near it. It was still a lot of fun to read. I'm not always a big fan of rhyming text because it often feels forced, but this one wasn't bad. I'd say there were only one or two parts that felt a little awkward, like they were thrown in just for the purpose of the rhyme. Otherwise a fun book with fun pictures. At least there's a good storyline. :)

Thursday, April 18, 2013

D Week, Part II


Here we go with a few of our D week activities.

Just bear in mind: I'm not into complicated. And I'm into imaginative fun. And I'm into not having to buy much "stuff" to teach my little ones.


Ducks & Donuts

We had a special kick off to the D week activities... Daddy was off work that day. So he took us to feed the d-d-d-ducks. And afterwards, we got d-d-d-donuts!


Dance Party

This one was really a blast. I spent a few minutes finding some fun music online (via YouTube videos and Pandora), cranked it up by piping it through the television, and duh-duh-duh-danced our hearts out! Here's the Hokey Pokey! We even threw in the "duck" dance (which might really be called the "chicken dance," but the little guy doesn't need to know that).


Do-As-I'm-Doing

Need I say more? I will say this, though - we made it as adventurous as possible. We used the entire main level of the house (sort of follow-the-leader style), and we took turns being the leader.


Wednesday, April 17, 2013

Writing Paper


I know awhile back I mentioned getting a pad of writing paper to teach the little guy how to draw his letters. Well, it was buggin' that I couldn't copy the originals that I created on the tablets, because the lines didn't transfer to the copy. So, I did a little measurin' and created my very own page of writing lines. It is very close to the exact size of the pad of writing paper I purchased. 

To download my homemade writing paper, click here!


Monday, April 15, 2013

D Week

 
I am seriously hoping that the letter D goes better than the letter C. We'll keep reviewing the past letters anyhow. 

Overall, I think I gotta quit thinking my kid's perfect. 'Cause he's not. And let's be honest, we're tryin' to keep our parent-caused issues to a minimum over here.

So, here we go with D!


I'm still trying my best to remember to continuously remind the little guy which letter we're on, and every time we encounter a D word. You know, when I have my brain in straight (scoff).


Here's the letter coloring page. Click here to download.


To download our coloring page of D words, click here.

Saturday, April 13, 2013

C Week Cont'd


Alright, so maybe it's not the most creative of things I could have done this week. But here were our "activities" for C week.


C Dinner

Nothing complicated here. (As if I ever do anything really complicated.)

Corn dogs
Cantaloupe
Cucumbers
Carrots

Voila. C Dinner is served!  (Sorry. No pictures. We did C dinner with all of the cousins, and it was a bit of a madhouse.)


Cupcake Caterpillars


This one was a lot of fun. 

Make cupcakes.

Yes, I used a box mix. There was no way I was up for attempting to make scratch cake batter with two assistants aged three and four. 

Frosting? I make my own. Having been raised by my Momma, it's not in my genes to buy frosting. This is basically the recipe I use, except I HALF it. And...

My name is Charlotte. And I'm a vanilla-holic. Therefore, I at least double the vanilla extract, and I usually like to mix in a little almond flavoring as well.

We tinted our frosting yellow.  You pick your own color.

Frost each cupcake, put a small smear of frosting on the bottom of the wrapper and stick it to a cardboard covered with tin foil. Arrange them in a caterpillar pattern.

Decorate. We used: Pull 'n' peel licorice for the antennae and mouths. Marshmallows cut in half along with chocolate chips for the eyes. Green sprinkles.


Friday, April 12, 2013

Children's Book Review: Goonight Moon

 
Goodnight Moon
written by Margaret Wise Brown
illustrated by Clement Hurd
published by HarperCollins

This one is a rarity. As I have mentioned before, I have a strong distaste for children's books that do not have a storyline. It's been a couple of weeks since I posted a new library book that we loved... because none of them have had storylines that were satisfactory for me. Now, that being said, this book does not have a qualifying storyline. But. We adore it. The summary of this book simply includes saying goodnight to various objects in a child's room.

The Little Guy's Impression
During the two weeks we kept this book, we read it at least twice each night, and sometimes three times. When I asked him about this one, his response was "We should go get it again."

Mom's Impression
I loved reading this one out loud.The images are subdued, but beautiful, and the words are simple. In a lot of ways, this one is a perfect bedtime story. I found myself reading in a hushed tone, and it almost seemed to quiet all of us to prepare for bedtime. One of my favorite aspects of this book was that by the end of the week the little guy would quietly recite the words with me. Granted, he was reciting from memory and not reading, it was fun for me to have him read it along with me. This is a book I would love to have in our home library.

Wednesday, April 10, 2013

C Week


It's C Week!

For now, we're only going to work on the hard C sound - the "kuh" sound. I decided to start with the this sound because a lot of the best words that start with C make the "kuh" sound: cat, candle, crayons, cookies, cake, car, candy, clock, etc. 

I figured that I would start with the "kuh" sound and much later I'll break it to the little guy that a lot of letters in the English language make more than one sound.

However! The little guy has seemed to have been struggling a little bit with this one because I chose to do the "kuh" sound first. It is his natural inclination to assume the sound of the letter is similar to the name of the letter. So, since it's pronounced "see," he struggled with it making a "kuh" sound.

Hindsight... maybe the "suh" sound would have been wiser to start with.


Here's the letter coloring page. Click here to download.


To download our coloring page of C words, click here.

Tuesday, April 9, 2013

One More B Thing

When it comes to B week, who could skip buh-buh-buh-banana bread?!?!

In our house, all three of the boys love banana bread (Dad, the little guy, and the baby). I've tried many recipes, but this one is my favorite. It's not complicated, and I make it with whole wheat, limited sugar, and basically no fat. This means I feel virtually no guilt in feeding it to my guys for breakfast.

I don't remember where I found the original recipe, but it was probably online somewhere. I have made a few of my own alterations.
 
Banana Bread


1 1/4 cups whole wheat flour
1 1/4 tsp baking powder
1/2 tsp baking soda
2 1/2 tsp cinnamon
1/8 tsp nutmeg
1/8 tsp salt
2 egg whites
1 1/2 cup mashed ripe bananas (approx. 4 medium)
1/2 cup sugar
1/2 cup applesauce
3 tsp vanilla extract

Preheat oven to 350 degrees. Lightly grease loaf pan. In a bowl, combine flour, baking powder, baking soda, cinnamon, nutmeg, and salt. In separate bowl mix together egg whites, bananas, sugar, applesauce, and vanilla. Stir flour mixture into banana mixture until moistened. Pour into prepared loaf pan. Bake for 45 to 50 minutes, until toothpick comes out clean. Cool bread in pan for 10 minutes, then remove. 

Variation Banana Muffins: You can also use this batter to make muffins instead of the loaf. For regular size muffins bake for 12 to 14 minutes. For mini muffins bake for 8 to 10 minutes.

Friday, April 5, 2013

Job Booklet


Blame it on my childhood, but the traditional "job chart" just never appealed to me. So, this is my version of my Momma's classic "job booklet." Set of jobs for the mornings, set of jobs for the evenings. The little guy gets to flip the page once he completes the job.

Granted, these are very simple jobs (i.e., get dressed and brush teeth), but, well, he's only three. We'll add more age-appropriate jobs as he gets older.

Supplies: 
Construction paper
Scissors
Crayons/markers
Glue stick
Hole punch
Binder rings
Laminating supplies (optional)
Job pictures (make your own, or use mine)


Directions:
1. Create your job pictures/download and print the ones I created by clicking here.
2. Color your images, or have your little one color them.
3. Cut them out.
4. Use the glue stick to mount them to various colors of construction paper.
5. Cut the construction paper.
6. Laminate (optional - see notes below)
7. Punch holes.
8. Bind with rings.
Voila!

P.S. If you're laminating, you probably can skip steps 4 and 5 entirely, if you want.


Notes on the Laminating Thing: I do want to note that a few months back I splurged and purchased the laminating machine. I had originally intended to buy what used to be known as "contact paper," simply clear sticky material that you could sort of laminate papers without the machine. (I have many fond memories of playing with my mom's contact paper.... much to her dismay.) This is the stuff I remember: http://www.amazon.com/Kittrich-999300-Clear-Contact-Paper/dp/B002HNYZ40. But my local stores didn't have the stuff, and well, let's be honest, I was too impatient to wait for it to be shipped. 

The self-laminating sheets made by Scotch that I found were twice the price per sheet than the thermal sheets. I also had several things I wanted to laminate. So, I went for it. I paid $25 for the machine (which also came with two laminating sheets), and $10 for a pack of 20 additional sheets. This is the product line: http://www.scotchbrand.com/wps/portal/3M/en_US/ScotchBrand/Scotch/Products/Catalog/?N=4294417741+5478822&rt=r3, and I really have been happy with these. (Click on the catalog item, then on "Where to Buy" to find a retailer near you.)

But... If you aren't up for any laminating, and you happen to have clear packing tape, you can always cover the surfaces in tape. This was how I used to laminate. Works great, just a little time consuming, and maybe not quite as nice looking.  


Thursday, April 4, 2013

B Week Activities


For some reason, this became quite the week of activities. We just had lots and lots to do!

My favorite aspect of this week was that I pretty much used only things we already had around the house.

One thing, though, is that throughout all of these activities I take the opportunity to remind the little guy about the letter B... So, as obnoxious as it might sound, every time we'd say "balloon" or "baseball," for example, I would pronounce it "buh-buh-balloon," or "buh-buh-baseball."


Balloon Baseball


Supplies: 
Balloon
Some long stick or toy or whatever

The stick we used (pictured below) was some little "groaning tube" thingy that we had bought the little guy at Walmart for $1 awhile back. He calls it his "bat," so that worked with the whole B theme as well.


Inflate the balloon. Hit it with the stick (bat). (I just used my hand, the little guy used the "bat.")


Our main kitchen/dining/living room area has ample room for the little guy to stand on one side of the couch, with me on the other side hitting back and forth. We played a game of "don't let the balloon touch the ground."


Bouncy House


Maybe it's cheating a little, since this wasn't exactly a home activity, but we took a trip to a nearby bouncy house. This one was extra special activity for us, because we got to go with all of the nieces and nephews. My sweet Momma found us a good deal, we ended up getting our little ones in for $5 a piece, and all of the adults jumped for free. What made it even greater, was that we were the only ones in the whole place.

At-Home Bowling

Supplies:
Empty baby snack tube containers
Medium-sized ball

Again, this is not very complicated. (Let's get real - very few things I do are complicated.) If I were more creative, and had more time, I probably would have done something cute to the snack containers, or at least I might have removed the wrappers. Maybe another day. Anyhow, just arrange the snack containers in a pyramid, take a few steps back, and roll that ball into them!


TIP:  Keep 'em! I found a random spot for these materials in the bottom of my pantry (right next to our indoor bowling lane). Every once in awhile when the little guy is looking for something to do, this is a fun option, especially since he can set the "pins" up by himself. Great entertainment when Momma's busy.


"Bullets"

Supplies:
Dart gun, such as Nerf
Darts with suction cup tips ("Bullets")

This one, as I mentioned before, worked out because we already had these "supplies" (AKA toys). For this, I drew a simple target, covered it with clear packing tape (creating a surface the suction cup bullets will stick to) and hung it on the wall. Then, we each took turns shooting at the homemade target from the other side of the room. It was fun to see how terrible I am at hitting a target.

I suppose if you don't have suction cup bullets, you can still play the other variation of this game we play with Dad when he's home. That game is called Shoot-Each-Other-as-Much-as-Possible. We have two rules with this game: no shooting the baby, and no shooting in the face. (We try to keep both eyes intact over here.)


We love B-B-B-Bodacious Bs!

Wednesday, April 3, 2013

B Week


On to the letter B.

Here are the basic teaching tools I've used. I'll post the fun activities on another post. 


Visual Recognition


Coloring Page


Once colored, we taped it to the wall next to our letter A from last week. I think we'll try building our own alphabet.


To download a copy of this document, click here.

Verbal Recognition

We have added to our little song, and now alternate between A and B.

What sound does a B make?
Buh, buh, buh!
What sound does a B make?Buh, buh, buh!

What sound does an A make?
A, a, a!
What sound does an A make?A, a, a!

Coloring Activity

Here is our coloring page of B words. To download a copy of this document, click here.


Writing

We didn't do anything new or creative with writing the letter B this week. Just took our Mead Raised Ruling tablet and traced big Bs and little Bs, then let him draw his own. 


I did, however, have to stay right by him the whole time to make sure he followed the correct order and pattern when forming the letters.


Hooray for B-B-B-BEAUTIFUL Bs!

Tuesday, April 2, 2013

Children's Book Review: Edward and the Pirates


Edward and the Pirates
written and illustrated by David McPhail
published by Little, Brown Books for Little Readers

This one's all about Edward, a kid who just loves to read. It tells of his many great reading adventures. He comes across a book in the library about lost pirate treasure, and when he takes the book home to read it, he gets a surprise visit from pirates!


The Little Guy's Impression
He had me read this book to him every night we had it checked out. He liked the illustrations; often I would have to pause extra long before turning the pages so he could study the illustrations more.

Mom's Impression
This was another book that had a storyline, so it was a big hit with me. It also scored big points with me because it was about reading and using your imagination; two of my favorite things for my kiddos. This is one I would definitely add to our home library.